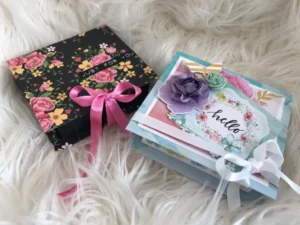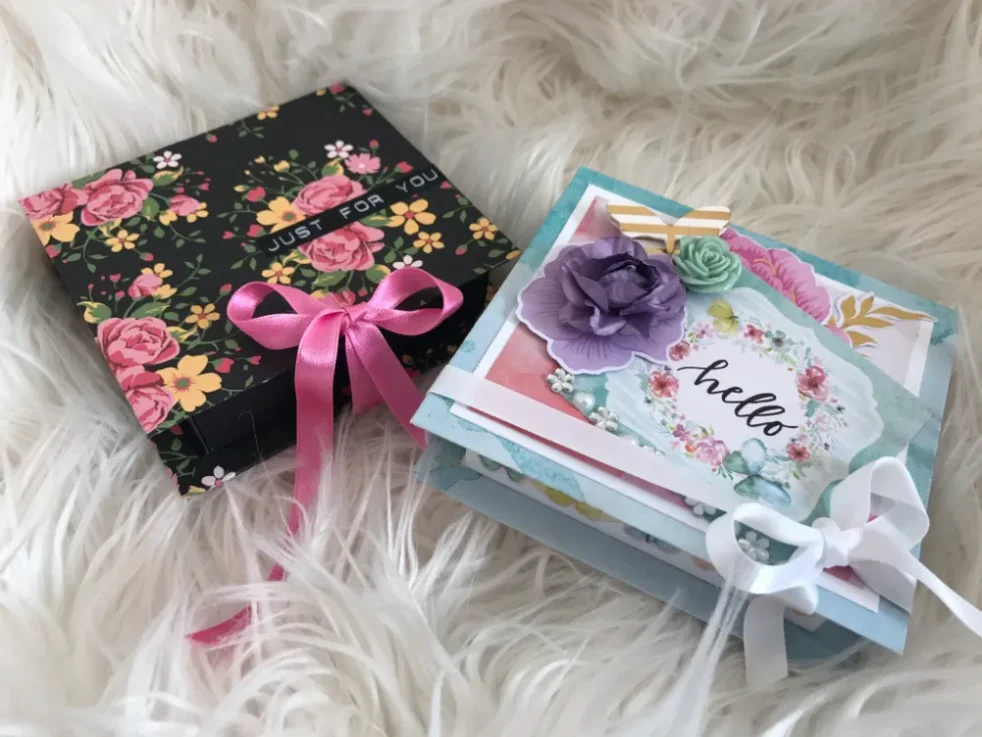
Today I am going to show you how to make these really cute and easy gift boxes!
Gift boxes always come in handy and these are the perfect size for jewellery, gift cards, cosmetics and other trinkets..
These can be customised for birthdays, Christmas, anniversaries, valentines, thank you’s or anything at all really!
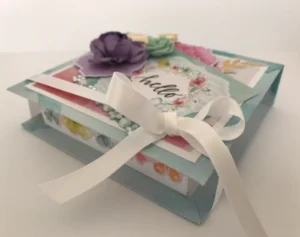
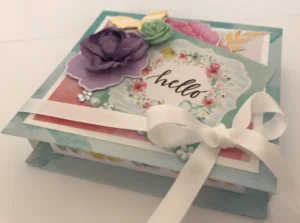
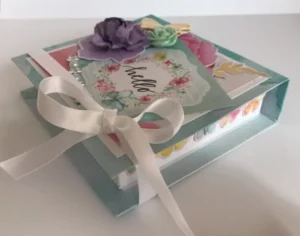
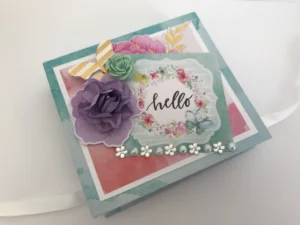
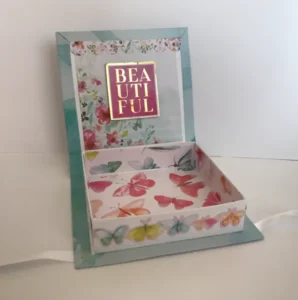
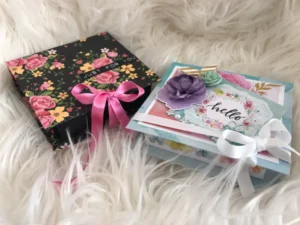
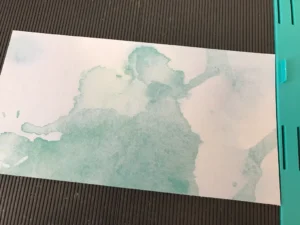
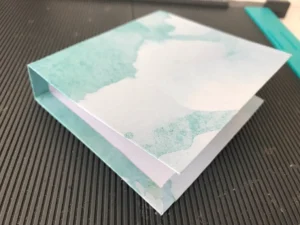
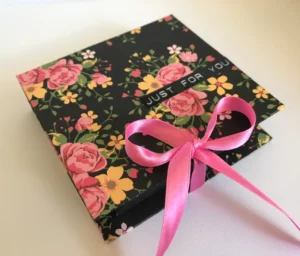
I made the pastel one using papers from Kaisercrafts “Wildflower” collection and the black one using a pretty floral paper from the “Hello Darling” paper pad from DCWV..
Aren’t these boxes super cute!.. I promise they are easy to make too!.. Here goes..
For this project you will need:
- 2 pieces of 30 x 30 or A4 size cardstock (at least 240gsm)
- Scoring board
- Scissors and/or a cutter
- Strong glue (I recommend roller tape glue)
- Decorative papers and embellishments
- Ribbon, twine or something similar to use as your box closure
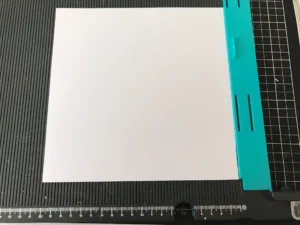
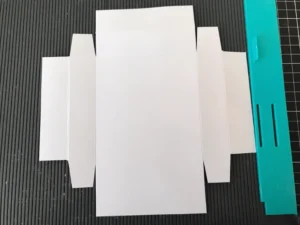
Step One:
- Cut a piece of card stock to 20 x 20cm
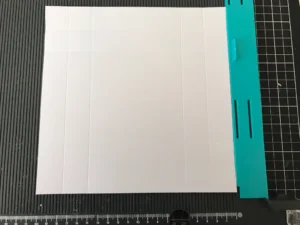
Step Two:
- Score all four sides of your cardstock at 2.5cm and 5cm
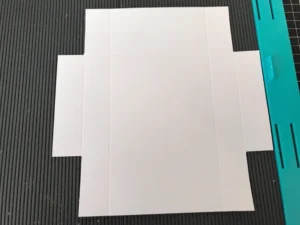
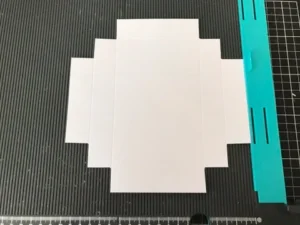
Step Three:
- Cut away the two (vertical) outside ‘squares’ at each corner
- Cut away the one remaining top ‘square’on the now exposed second row
- Cut down the vertical score line of the remaining square (to the opposing horizontal score line) to create a ‘flap’
- Lightly shape the remaining flap edges so that they do not interfere when they are folded
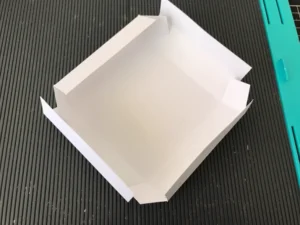
Step Four:
- Fold all score lines in a downwards (valley) fold
- Your box should now be taking shape!
- Apply glue to the ‘outside’ of each of the 4 ‘flaps’
- Glue the ‘flaps’ to the adjoining side of the box (Tip: Ensure your corners/sides are lined up before securing the glue, it’s easiest to check this from the outside of the box)
- Now apply glue to the inner of the top section of all 4 sides and glue these down covering the flaps/sides
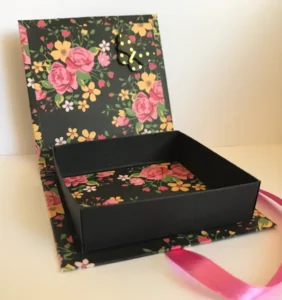
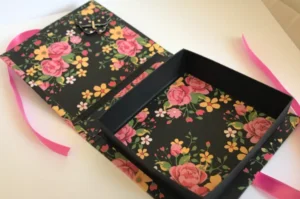
- You can now decorate your box inner and outer (excluding outer base as it won’t be seen in the end)
- Cut your inner base decorative piece 9.5 x 9.5cm, outer edge pieces 9.5 x 2cm
Step Five:
- We will now create the box enclosure/ lid
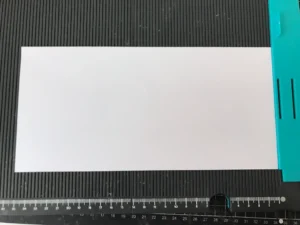
- Cut a piece of card stock to 25 x 12cm
Step Six:
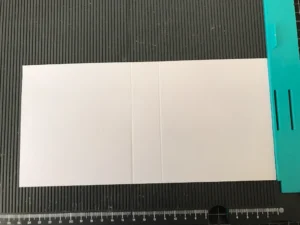
- With your card stock in a landscape direction, score at 11cm and 14cm
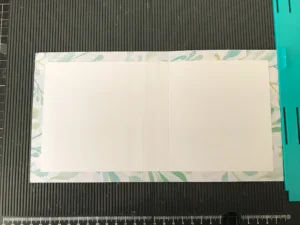
Step Seven:
- Cut a piece of decorative paper to 27.5 x 14.5cm (I allow the extra .5 to allow for any mis-measurement etc when its folded)
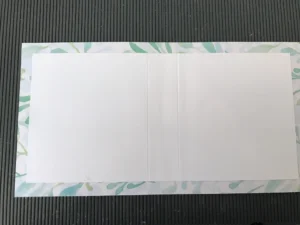
- Adhere the decorative paper over the top of your cardstock – ensure your card stock is centred (you don’t need to measure, just eyeball it so it looks centre!)
- Re-score the original score lines all the way to the edge of the decorative paper (as per your card stock piece) so that the decorative paper folds neatly along with your card stock
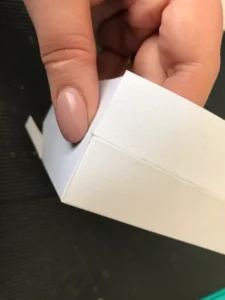
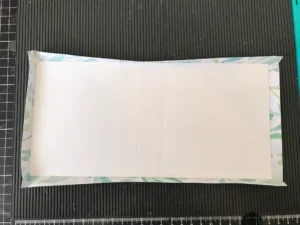
Step Eight:
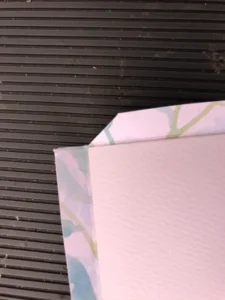
- You now want to fold the edges of your decorative paper over the edges of your card stock to form a neat border on the inner (Tip: You may find it easier to fold your paper if you score around the edge of the card stock prior to folding)
- Trim away the excess at the corners so they are nicely presented/ folded when stuck down
- Glue down the ‘border’
- Fold and gently burnish your score lines to create your lid/ enclosure
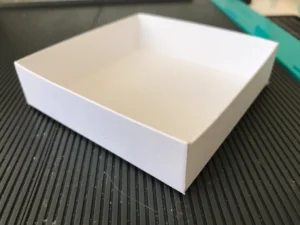
Step Nine:
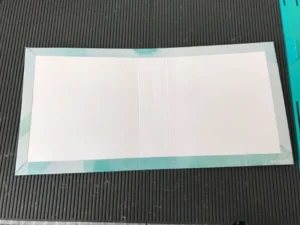
- Now simply apply glue to the base of your box we created earlier and adhere it to the ‘bottom’ of your enclosure/ lid piece
- Your box should sit neatly centred to the sides of the lid, up against the edge of the front border, and far enough forward that it does not interfere with the rear folded score line
Step Ten:
- You are all done – Told you it was easy!
- Go pop that champagne, pour a glass, maybe grab a snack.. then come back to finish decorating your box however you like!
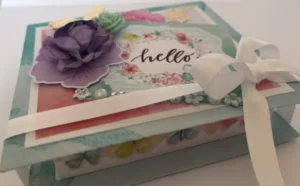
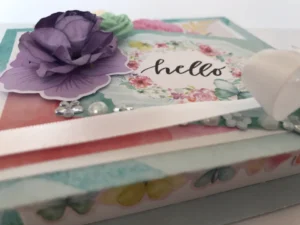
- On the black box shown I adhered ribbon to the top and bottom of the box and tied them together, on the pastel coloured box I only used 1 piece of ribbon which I glued at the centre bottom of the box and wrapped around the sides.. Do whatever suits you!
Here’s a closer look at mine!
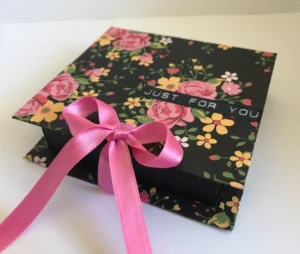
The black floral box was my first attempt (so please excuse any mistakes!).. Also as the lovely floral paper on this one was so ‘busy’ I chose not to decorate the sides of the box as i didn’t think it needed it!..
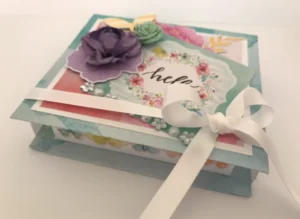
Here’s my second one.. I love this one.. such pretty pastel-y colours