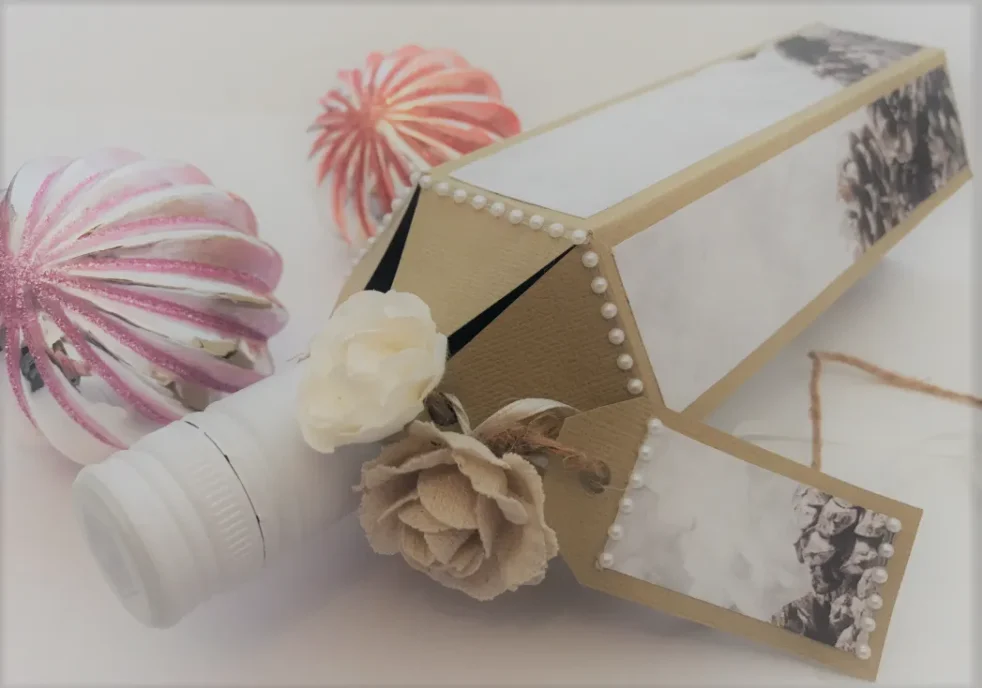
Today I am going to show you how to create a beautiful wine bottle gift box from 1 sheet of 30 x 30cm cardstock.
I have made mine using a Christmas theme, but these can be made for any occasion and are a great way to fancy up a plain looking bottle of wine, or any other similar size beverage bottle.
This box will fit most standard 750ml bottles of wine (but most unfortunately as champagne bottles are a bit wider than wine bottles they won’t fit in! – sorry!)
For my box shown I used Kaisercraft premium cardstock in ‘Mocha’ and Paper from the Kaisercraft Christmas collection ‘Frosted’ called ‘Glacial’.
For this project you will need:
- 1 x Page of 30x30cm cardstock (240gsm or higher)
- 1 x Page of 30×30 or A4 size decorative paper
- 1 x Bottle of wine (an empty one will be fine for the purposes of making the box if you have not selected your ‘gift’ wine yet)
- Ribbon or twine or lace or something similar
- Scoring board
- Glue
- Scissors
- Embellishments (optional)
Are you ready?.. Here we go:
Step 1:
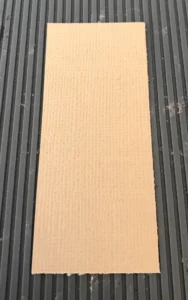
- Trim your cardstock to 30cm x 28cm

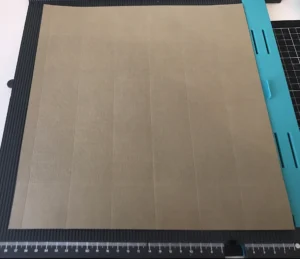
Step 2:
- On the 30cm side, score the the sheet (all the way across) at 5cm and at 25cm.
- Turn the card around and on the 28cm side, score the sheet (all the way across) at 4.5cm, 9cm, 13.5cm, 18cm, 22.5cm and 27cm (so you have created 6 x rectangles and one small ‘flap’ at the end)

Step 3:
- On one side (which will be your top) where you have created 6 x squares, make a small mark at the top of the page at the centre of each square (tip – as each square is 4.5cm, centre will be 2.25cm – You can mark this using your scoring board or a pencil)
Step 4:
- On each side of the card, cut the score lines dividing the ‘boxes’ down to the horizontal score line (at 5cm)
- Cut away the corner pieces on the end 1cm flap.
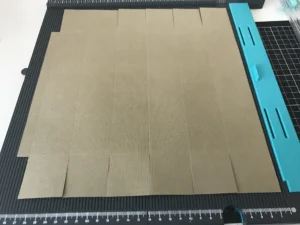
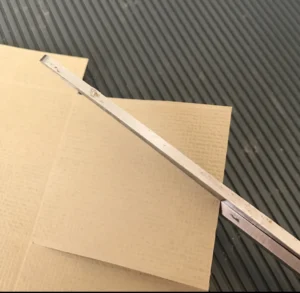
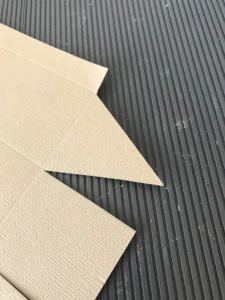
Step 5:
- On the top (where you marked the centre earlier), you need to trim away the corners of the ‘squares’ to form ‘triangles’
- Simply line your scissors up from the centre mark pointing to the corner of the square and snip.
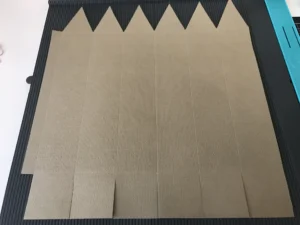
Step 6:
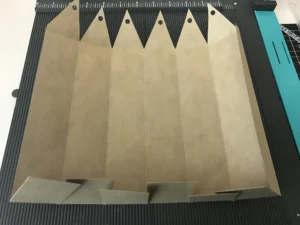
- Punch a hole in the pointy end of each of the triangle flaps (tip – ensure it is not too near to the edge that your cardstock will rip)
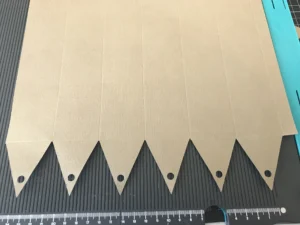
Step 7:
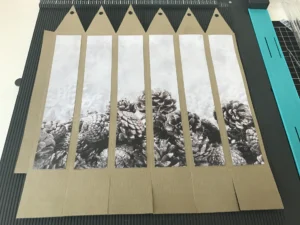
- Cut your decorative papers for the outside of the box by cutting 6 strips that are 3.5cm wide by 19.5cm long and stick them on in the centre of each ‘rectangle’ (tip – remember if working with a ‘right way up pattern’ that the side with the triangles will be up^)
Step 8:
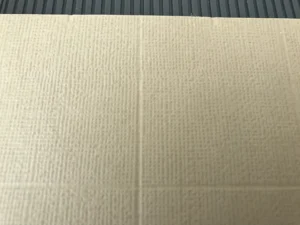
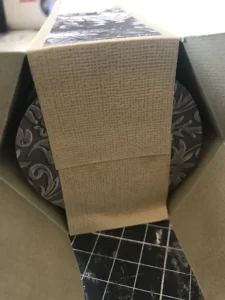
- Fold and burnish all score lines, folding score lines in an outwards direction
- Apply glue to the ‘outside’ side of the 1cm flap section and glue the flap to the ‘inside’ of the other side of the box
Step 9:
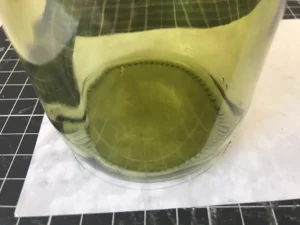
- Grab a piece of the leftover decorative paper and your wine bottle
- Trace around the base of your bottle forming a circle
- Cut the circle out
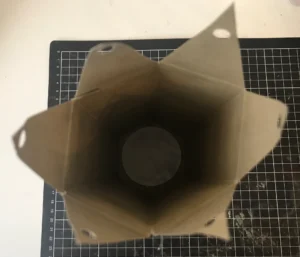
Step 10:
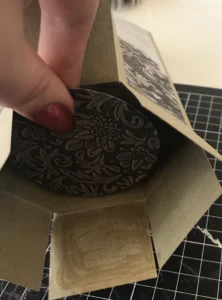
- Place your circle inside the box and stick your first square flap to the circle
- Once your first flap is stuck to the circle piece, insert your bottle into the box (as this gives you a side to push against) and stick the rest of the flaps down overlapping against the circle.
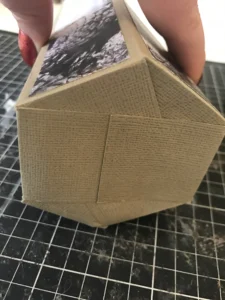
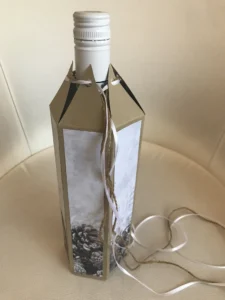
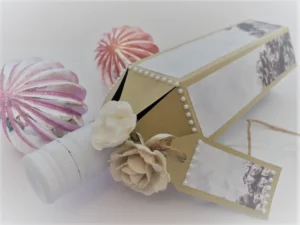
- Once all flaps are stuck, turn the box right side up and that’s all of the ‘construction’ done! You should now have a standing ‘hexagon’ shaped box.
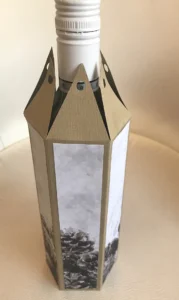
Step 11:
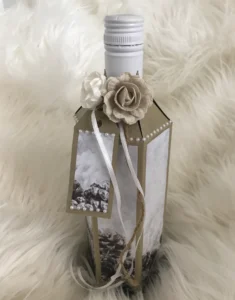
- Use ribbon, twine, lace or any other similar materials to form the closure of your box by wrapping it through the punched holes in the triangles. (I used both twine and thin white ribbon for mine)
- Embellish as you would like (I added white and beige flowers and strip pearls around the curve at the top).
Step 12 (Optional):
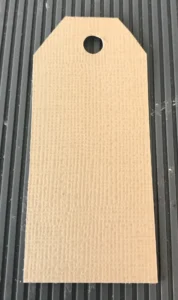
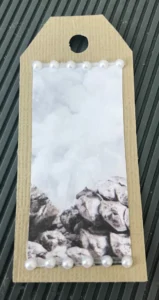
If you would like to make a gift tag for your bottle as I have done:
- Take the piece of cardstock you cut of at the beginning of the project (when you cut your sheet down to 28cm)
- Cut to 8cm in length
- Evenly trim away each of the corners at the top of the rectangle to give the ‘tag’ shape
- Punch a hole in the centre top of the tag.
- Cut a piece of your decorative paper to 3cm x 6cm and adhere this to the tag.
- Embellish the tag however you would like (I added matching pearls to my box)
- Attach it to your box by tying it to one of your closure ribbons/ twine
Step back and admire your work – Won’t that look great under the tree!
Now go pop that champagne – You deserve it! Well done!
Absolutely brilliant instructions. Thank you! One for me to try